


Getting a consistently straight edge with a circular saw is less about luck and more about the guide and setup you pick. In short, the right straight edge converts a handheld tool into a precision cutter. Keep reading — because the difference between a ragged, tear-out finish and a factory-like edge often comes down to one simple choice: guide method. Here’s what this review covers: why guided cuts outperform freehand sawing, how to choose between a clamped straight edge, a track system, or a rip fence, and practical tips that pros use every day. We’ll reference the best circular saw track options for sheet goods, consider how a rip guide compares to the best circular saw rip fence for repeatable rips, and place those in context with general tool choice, including the best circular saw for those who value accuracy and ergonomics.
Top Picks
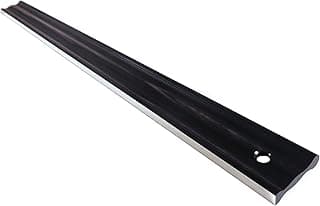
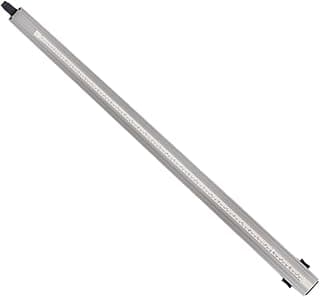
Best Precision Straightness: 24 Inch Anodized Aluminum Straight Edge Guaranteed
The 24 Inch Anodized Aluminum Straight Edge SE24 stands out for its remarkable precision, guaranteed straight to within 0.001 inches along its full 24-inch length. This level of accuracy makes it a trusted tool for woodworkers, machinists, and anyone requiring tight tolerances in layout or measurement tasks. Its anodized aluminum construction combines strength with lightweight handling, while the 7/16-inch thickness and 1¾-inch width provide a balanced feel that resists flexing during use. The machined flat reference edge ensures smooth, consistent contact with work surfaces, and the contoured cross-section enhances grip for steady alignment. A convenient hanging hole adds storage ease, underscoring the tool’s practical design.
From a user perspective, buyers appreciate the SE24 for its exceptional precision and build quality, noting that it maintains accuracy even after extended use. Many find the anodized finish both attractive and functional, preventing corrosion and wear. However, some users mention its higher cost compared to basic aluminum or steel straight edges, and others wish for a longer version for larger projects. Overall, it’s highly regarded by professionals who value uncompromising accuracy and durability in their measuring tools.

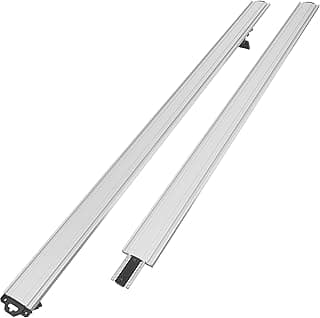
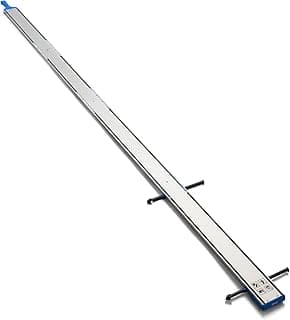
Best Extendable Clamp Guide: ProGrip GCX 100" Straight Edge Clamp for Circular Saw
The ProGrip GCX 100" Straight Edge Clamp delivers a balance of precision and versatility that appeals to both professionals and serious DIYers. Its adjustable design extends from 50 to 100 inches, making it ideal for cutting large panels or full sheets of plywood with consistent accuracy. The extruded aluminum body provides a durable yet lightweight build that’s easy to maneuver, while the quick-release and dual cam locking system offers over 110 pounds of clamping force to hold workpieces firmly in place. Users can rely on the clamp’s stability during long rip cuts or crosscuts, minimizing material shift for cleaner, straighter results.
Many customers highlight its compatibility with multiple tools—circular saws, routers, and jigsaws—making it a flexible guide for various woodworking tasks. The non-marring TPR pads are another appreciated feature, gripping securely without scratching finished surfaces. However, when fully extended, the guide can feel slightly bulky to handle, and a bit of flex may appear under heavy downward pressure. Still, for most cutting applications, the ProGrip GCX offers impressive stability, precise alignment, and dependable performance across a wide range of materials and tools.

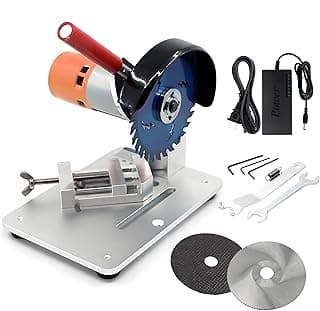
Best Compact Saw Guide: POWERTEC 36 Inch Circular Saw Guide/Straight Edge Guide
The POWERTEC 36" Straight Edge Clamp Saw Guide is a well-engineered solution for precise, straight cuts in woodworking and DIY projects. Designed for both professionals and beginners, it provides a stable guide for saws, routers, and jointers, allowing users to achieve clean, accurate results with minimal setup. Its space-saving 36-inch length is ideal for smaller workpieces or compact workshops, offering full adjustability to accommodate a variety of materials. The lightweight yet strong aluminum construction ensures the guide remains rigid during operation, resisting bending under cutting pressure.
Users appreciate the intuitive locking mechanism that simplifies setup. With a push-down lever on the fixed clamp and an adjustable end clamp, it quickly secures to the work surface for a reliable hold. The low-profile jaws enable inverted use, keeping the workspace unobstructed—a thoughtful touch for precision work. While some customers note that the 36-inch limit restricts its use on larger panels and wish for built-in measurement markings, most find its durability, ease of use, and accuracy to be excellent for its size and price. Overall, the POWERTEC 36" guide clamp offers solid performance and dependable straightness in a compact, user-friendly package.

FAQs
What to use as a straight edge for a circular saw?
Use a guide that is rigid, perfectly straight, and easy to clamp. Common options:
-
Aluminum or extruded straight edge (factory guides).
Pros: very straight, lightweight, durable, often have built-in clamping or anti-slip features. Cons: cost and limited length options. -
Track/rail systems.
Pros: designed with a slot or edge that mates to the saw base for near-perfect, splinter-free cuts. Ideal for sheet goods. Cons: more expensive; some tracks require saw adapters. -
Clamped timber or plywood with a straight edge face.
Pros: cheap and easy — use a straight, surfaced board or melamine-faced board as the guide; melamine helps reduce friction and splintering. Cons: requires careful marking and checking for straightness. -
Contractor’s level or long metal ruler.
Pros: readily available, useful for short guides. Cons: may not be long enough or rigid enough for long rips. -
Rip fence or shop-made fence.
Pros: excellent for repeated rips of the same width; highly repeatable when mounted to a workbench or sawhorses. Cons: portability and setup time. -
Chalk line or laser layout + sacrificial guide.
Use a chalk line to mark, then clamp a guide along that mark. Lasers help align long cuts but still require a physical guide for the saw to reference.
How to choose: for long, precise sheet cuts prefer a purpose-built track. For one-off rips, a straight piece of surfaced board or an aluminum extruded edge clamped firmly works very well. For repeatable rips, build or use a rip fence.
Is a circular saw good for straight cuts?
Yes — when used with a proper guide, a circular saw can make very straight, accurate cuts, but there are limits and caveats.
-
Accuracy expectations.
A guided circular saw can routinely hold tolerances within 1/16" (1.5 mm) over several feet when set up and used correctly. For extreme precision (fine furniture joinery or repeated sub-millimeter tolerances), a table saw or a track saw will typically be superior. -
Factors that affect straightness.
Blade quality and sharpness, correct blade depth, shoe condition (no warped shoe), saw base alignment (shoe parallel to blade), and a rigid guide/clamping all matter. Any play in the saw or guide will degrade results. -
Material considerations.
Sheet goods like plywood or MDF benefit greatly from a track or zero-clearance backing to minimize tear-out. Dimensional lumber can be ripped straight, but twisted or bowed stock will require flattening or jointing first. -
Practical use cases.
For jobsite cutting, on-site cabinetry, and large panels a circular saw with a straight edge is an excellent, portable solution. For production shop work, a table saw or dedicated track saw system may be faster and more repeatable.
What is the best tool for making straight lines?
“Best” depends on the job, but here are the most reliable tools by context:
-
For layout lines on workpieces: a good quality chalk line for long, straight marks; a combination square or engineer’s square for short, accurate lines; and a laser line level for fast alignment across long distances.
-
For guiding a cutting tool: a track/guide rail system (used with the saw) is the most precise and simplest to use for long cuts in sheet goods. A shop-built or aftermarket straight edge (aluminum extrusion, steel rule, or melamine-faced board) works well when clamped and checked for straightness.
-
For repeatable rips: a fixed rip fence on a table or a portable rip fence designed for circular saws delivers consistent results.
-
General recommendation: if you need the cleanest, most tear-out-free cuts on plywood, use a track system; for layout lines and transfer marks, use a chalk line or laser.
How to cut a straight edge with a circular saw?
Follow a clear, repeatable procedure:
-
Check and prepare the saw.
Verify the saw’s shoe is flat and the blade is sharp. Confirm the blade is perpendicular to the shoe (or set to the desired bevel) and there is no lateral play. -
Mark your cut.
Use a pencil and a straightedge or chalk line to mark the cut on the face that will be visible after cutting. If you worry about tear-out, mark the cut on the underside and plan the cut so the visible face is against the guide. -
Choose and position the guide.
Align an aluminum straight edge, track, or clamped board so the edge of the guide is exactly the distance from the saw blade to the saw’s shoe reference (measure the offset). A trick: measure from the blade kerf to the saw shoe and transfer that offset to position the guide so the blade cuts the marked line. -
Clamp securely.
Use clamps that won’t shift. If cutting large panels, support the work on sawhorses to prevent sagging and keep the workpiece flat against the guide. -
Set blade depth and run a score cut (optional).
Set the blade to no more than 1/8" deeper than the thickness of the material for clean cuts. For veneer or plywood, make a shallow scoring pass first to reduce tear-out. -
Use a sacrificial backing if needed.
When cutting thin veneers or when splintering is critical, put a sacrificial strip of melamine or plywood alongside the cut to support fibers at the exit. -
Make the cut with steady feed.
Position the saw shoe against the guide, start the blade to full speed, then move the saw steadily along the guide without twisting or forcing. Let the blade do the work. -
Finish and check.
After the cut, check the edge for straightness and square. Light sanding or a plane can clean minor imperfections.
Safety reminders: always wear eye and hearing protection, secure workpieces, and keep hands out of the blade path. Use a push stick or helper when needed.
Final Thoughts
A circular saw can deliver remarkably straight, professional-looking edges when paired with the right guide and a disciplined setup. For single or occasional cuts, a well-clamped aluminum straight edge or surfacing board provides excellent results; for long, splinter-free panel cuts, track systems perform best; and for repetitive rips a dedicated rip fence is the most practical solution. Focus on blade condition, correct blade depth, and a rigid, accurately positioned guide — do that, and your handheld circular saw will consistently produce clean, straight edges.